School Faculty Computer Builds
Intake Phase:
Initial Processing
- Welcome faculty member at the intake table
- Find their build sheet printout. Make sure that the build sheet matches on their name and PCN computer number.
- Direct the faculty member to an open station with an IT staff member or volunteer that will be assisting with their migration.
If an open station is not available have the faculty member wait or come back at a later time. Don't let the faculty member drop off the laptop and leave without completing the intake phase!
Capture User Information and Settings
Before wiping the device, we need to capture some data and settings that will not automatically transfer to the new build. These steps will help the user have some familiarity with their new setup and reduce frustration in the new Windows 11 environment.
Step 1: Fill out Build Sheet
- At the top of the build sheet fill out your name in the
Intake Person Name:field - Fill out the Name labeled on the USB Thumb Drive at your station in the
USB Thumb Drive:field.
Step 2: Have faculty member log into their current computer
- The faculty member received an email prior to the migration making sure that they remember their password and update any expired or expiring soon passwords before the cutoff date.
- However if they can't login to their computer ask the floor manager for assistance.
Step 3: Create Folder in USB Thumb Drive
- Plug in the intake station's USB Thumb Drive in the faculty member's computer
- Open File Explorer and select the USB Thumb Drive in the left navigation pane
- Click the
New Foldericon in the Top Naviagtion Bar
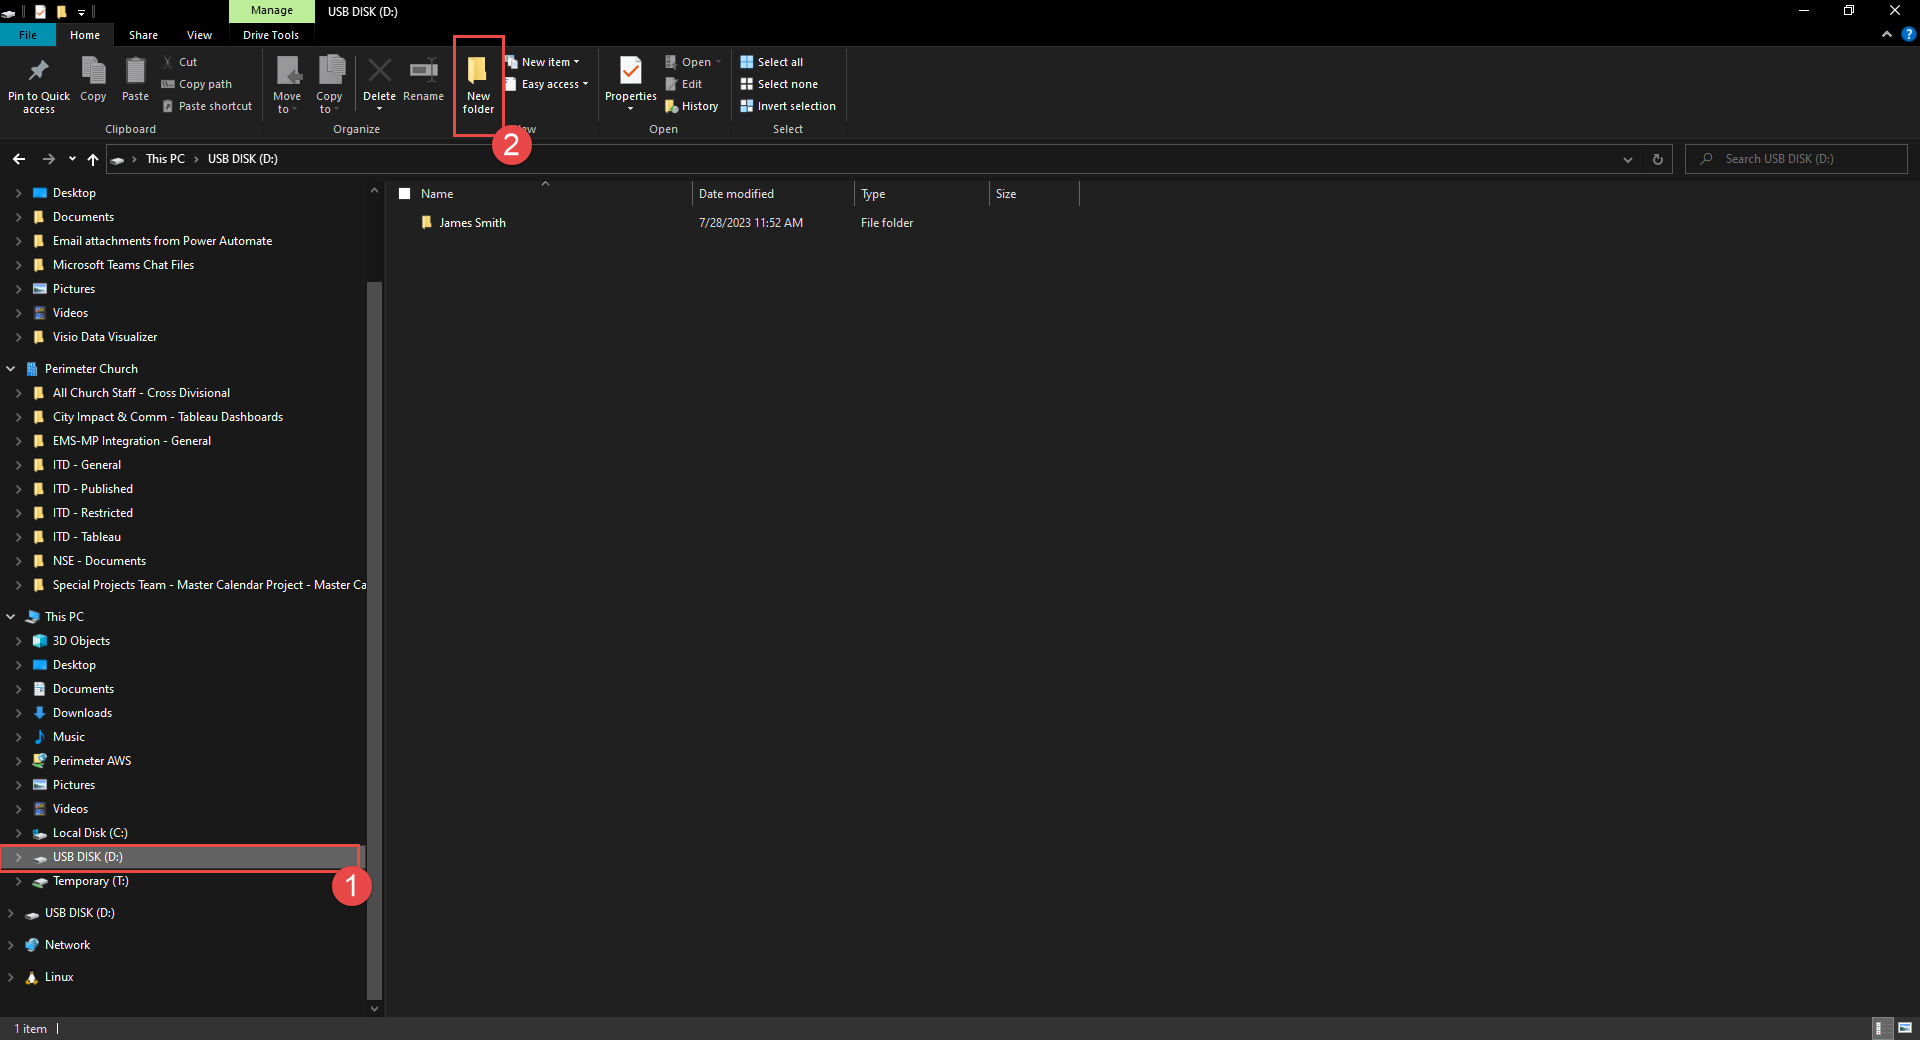
- Name the folder with the Faculty Member's
First NameLast Name - Open Faculty Member's new folder
Step 4: Export Passwords out of Google Chrome
- Open Google Chrome
- In the URL Bar enter:
chrome://settings/passwords
- In the saved password section click the
...button in the upper right hand corner of the section
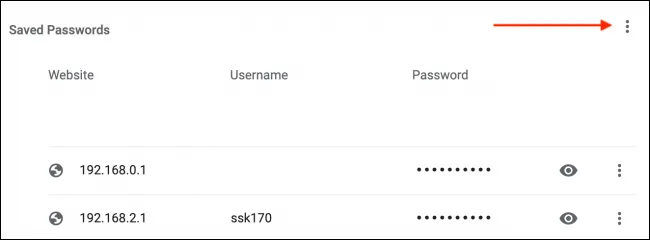
- Select the
Export Passwordsoption

- Have the faculty member enter their
usernameandpasswordto access the export. It is the same credentials they used to access their computer. - Save the file as the faculty member's
[First Name] [Last Name] Passwordsin the faculty member's folder on the USB thumb Drive.
Step 5: Export Bookmarks out of Google Chrome
- Open Google Chrome
- Use the shortcut
Ctrl+Shift+Oto open Bookmark Manager - On the Bookmark Manager Page, click the
...menu icon in the top right hand corner and select "Export Bookmarks"
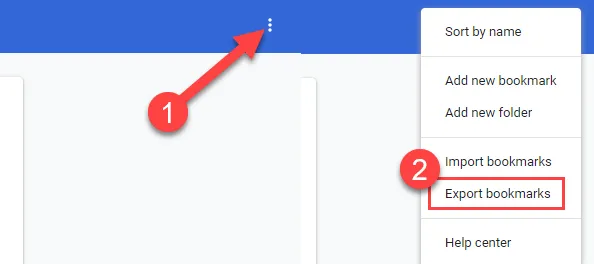
- A file explorer window will appear, select the Faculty Members folder on the USB thumb drive that was made in step 3.
- Save the file as the faculty member's
[First Name] [Last Name] Bookmarks.html
Step 6: Take picture of the User's Desktop
- Lastly, Use the shortcut
⊞ Win+Shift+Sto take a screenshot - Select the Fullscreen snip option in the top toolbar

- After the screenshot, click on the photo that pops up on the bottom right of the screen in the notificaiton center.
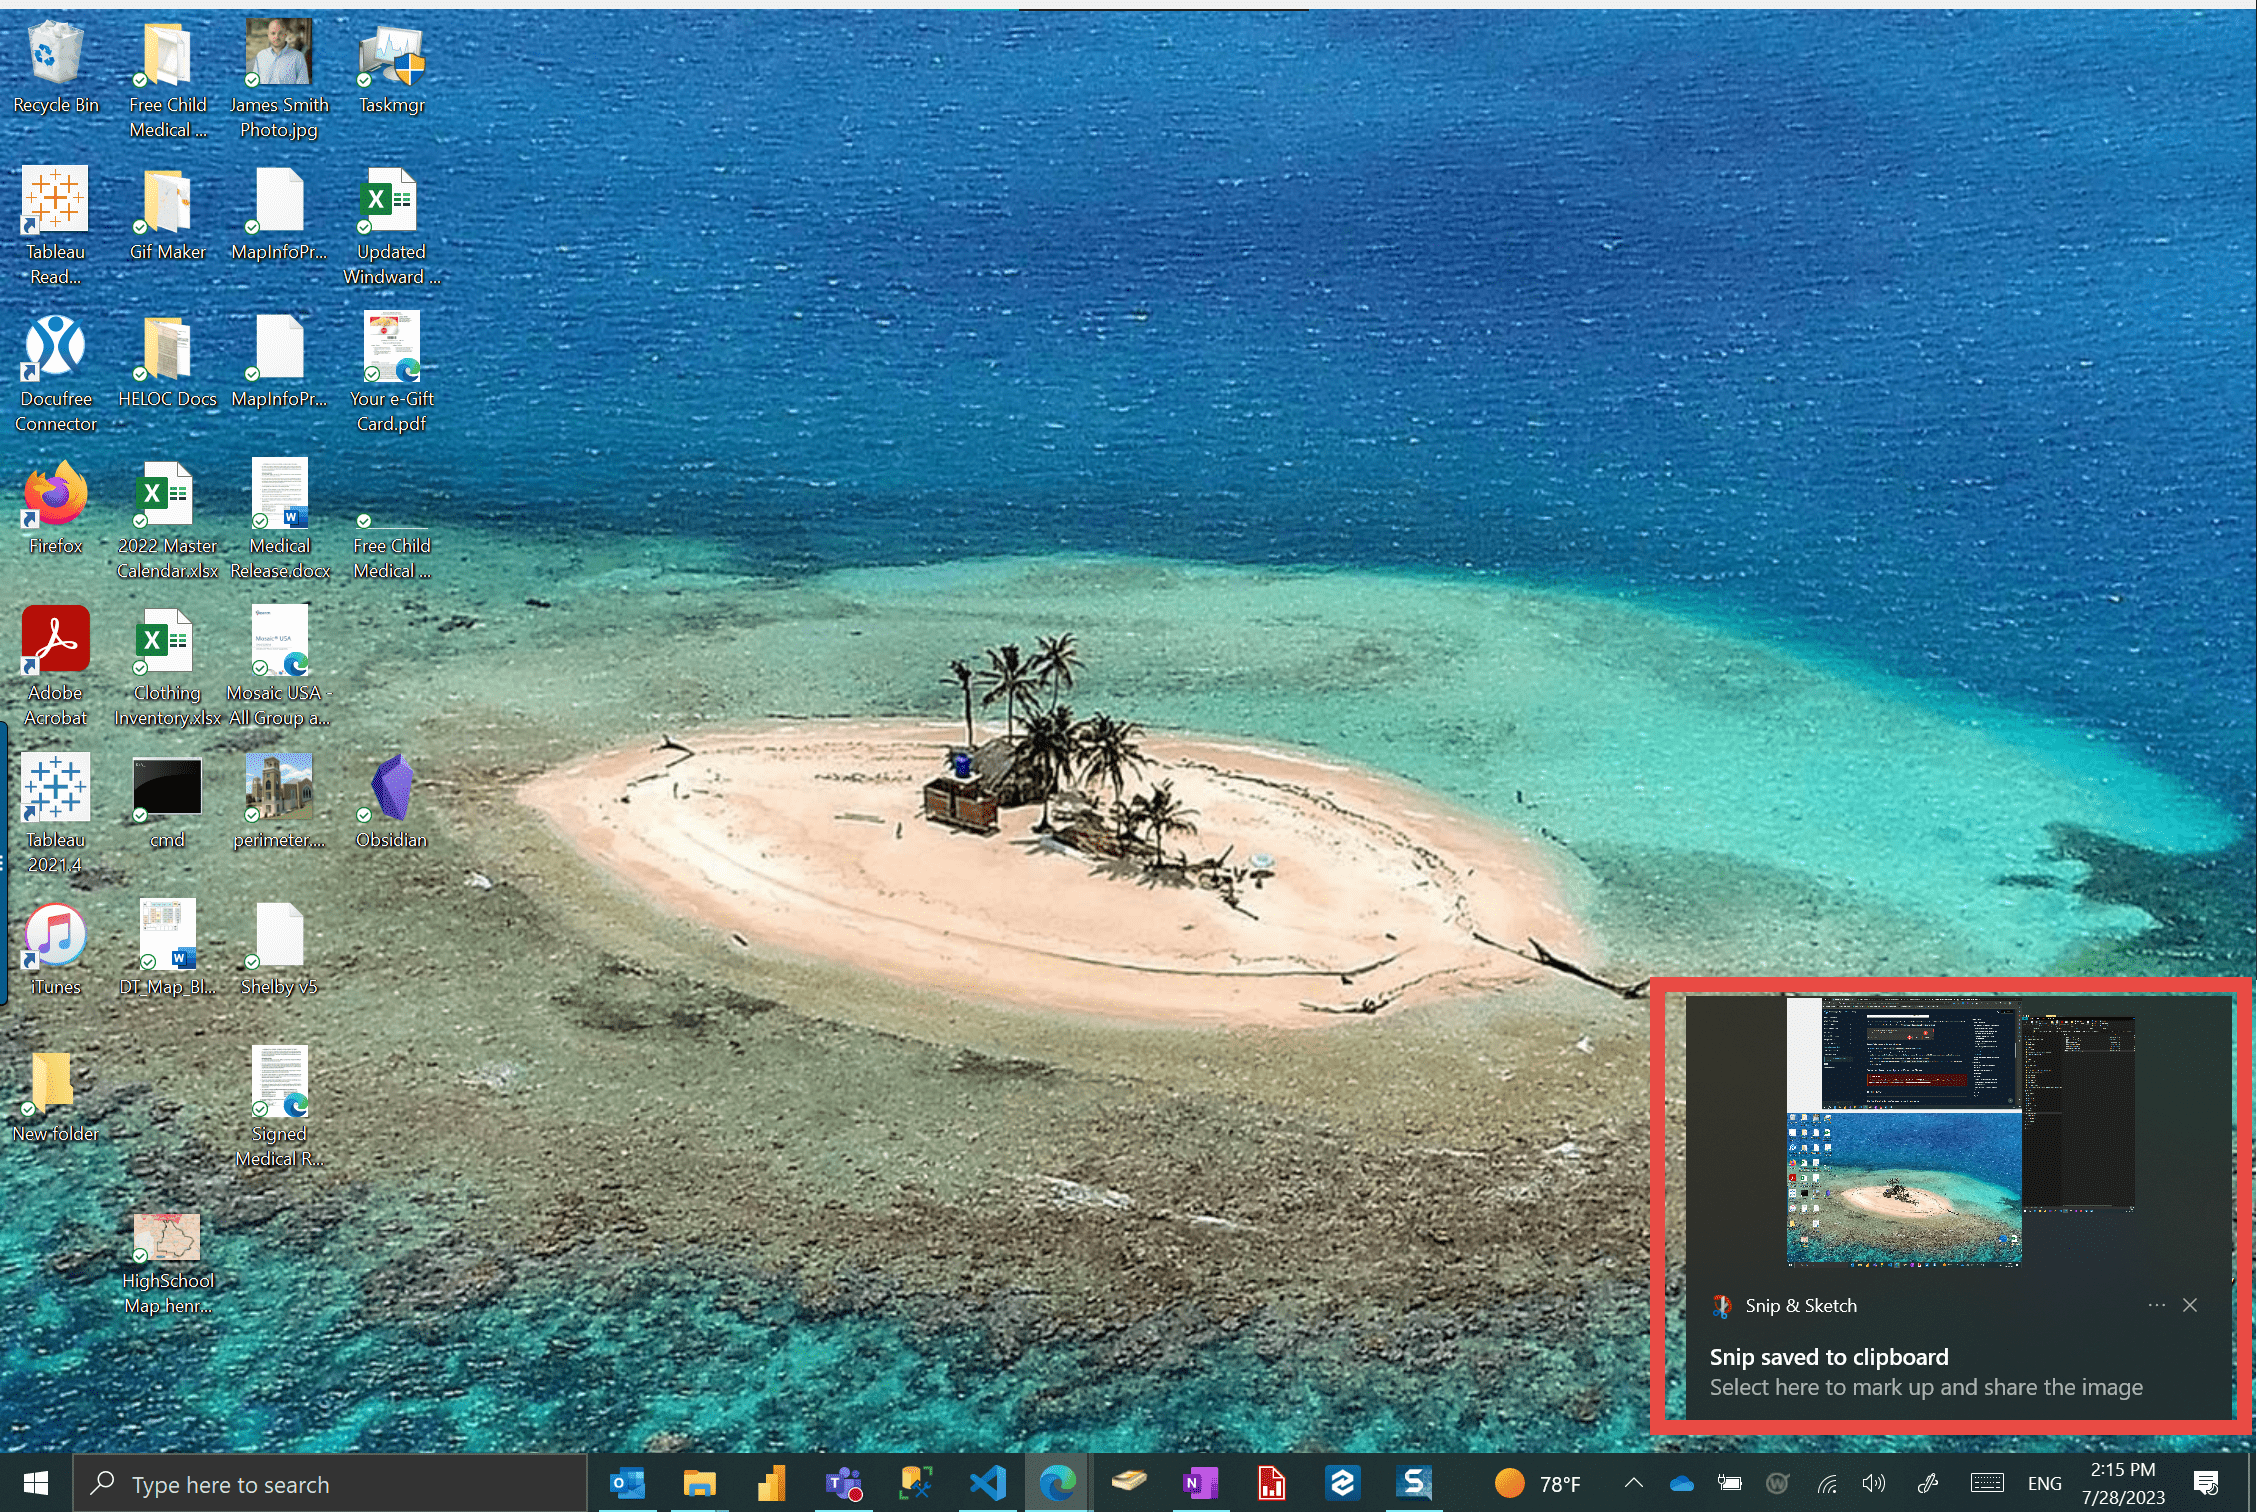
- In the Snip and Sketch editor, select Save as icon in the top right toolbar.
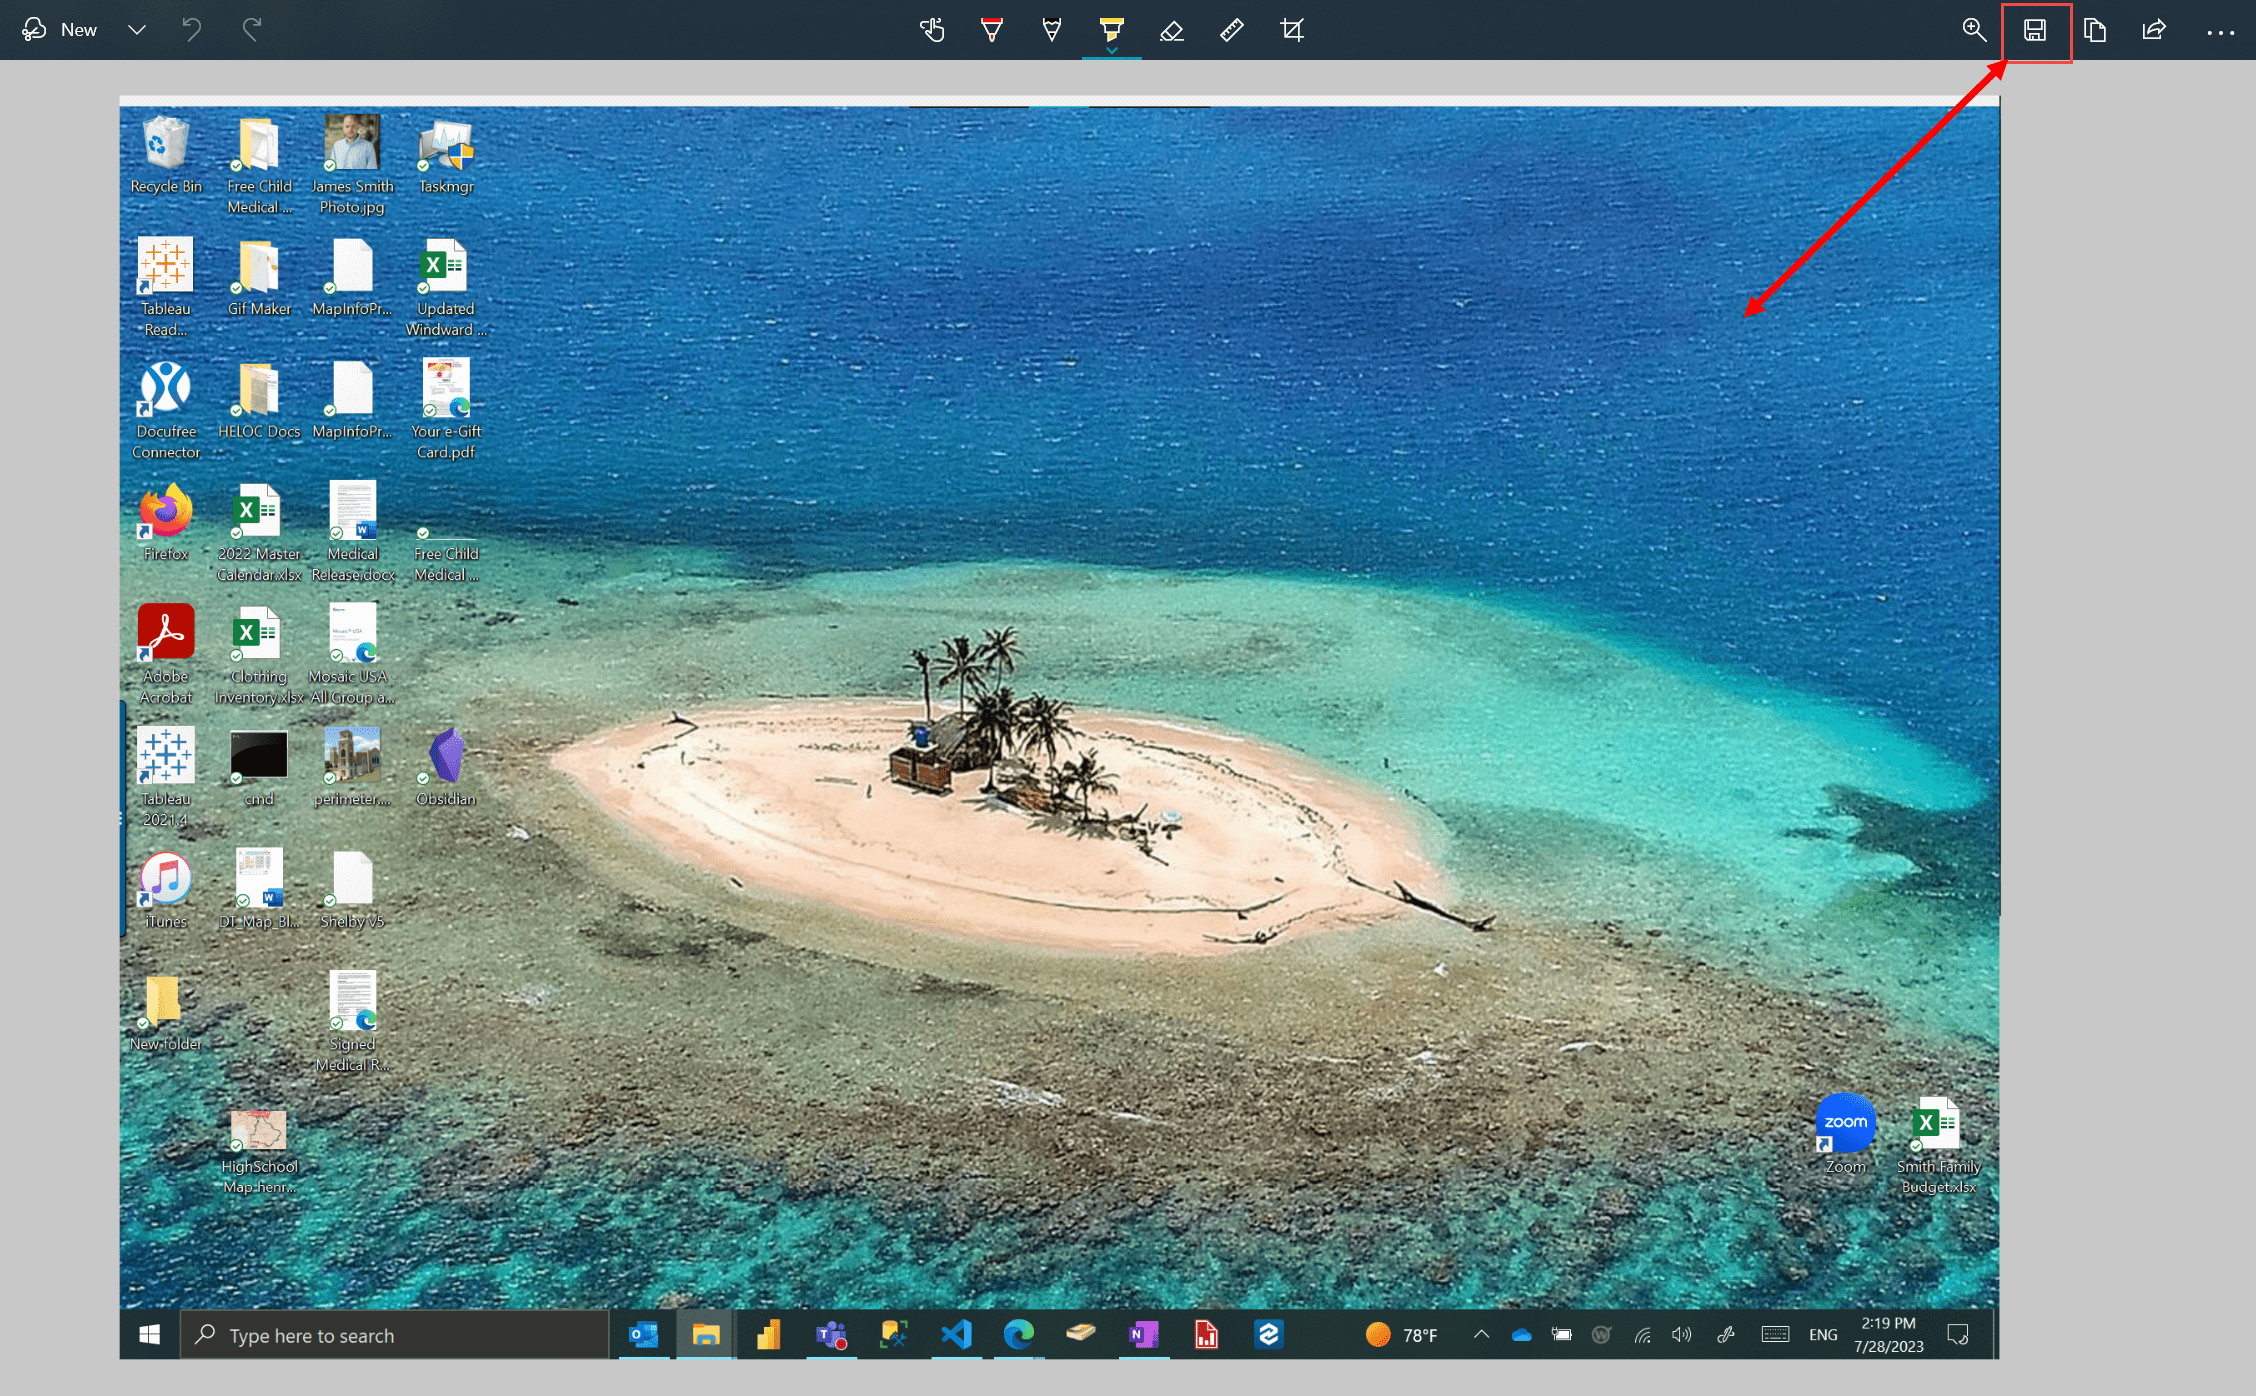
- Save the file as the faculty member's
[First Name] [Last Name] Desktopin the faculty member's folder on the USB thumb Drive.
- Double check and mark the checkboxes on buildsheet
- Sign your name at the bottom of the intake section
- Using the tape at the intake station, tape the top and bottom of the build sheet to top of the laptop
If there is a high volume of faculty waiting steps 7 and 8 can be completed in a group setting. Once you have completed the Handoff to the Build Station. Send the faculty member to the waiting area in the back of the room and take the next faculty member in line.
Setup Authenticator App and Email on Phone
All school faculty will be on multi-factored authentication (MFA) in the new tennant. The steps listed below are not optional and are required to be completed before the faculty member leaves.
Step 7: Download Microsoft Authenticator App
- Download the Mircosoft Authenticator App from the Apple Store or Google Play
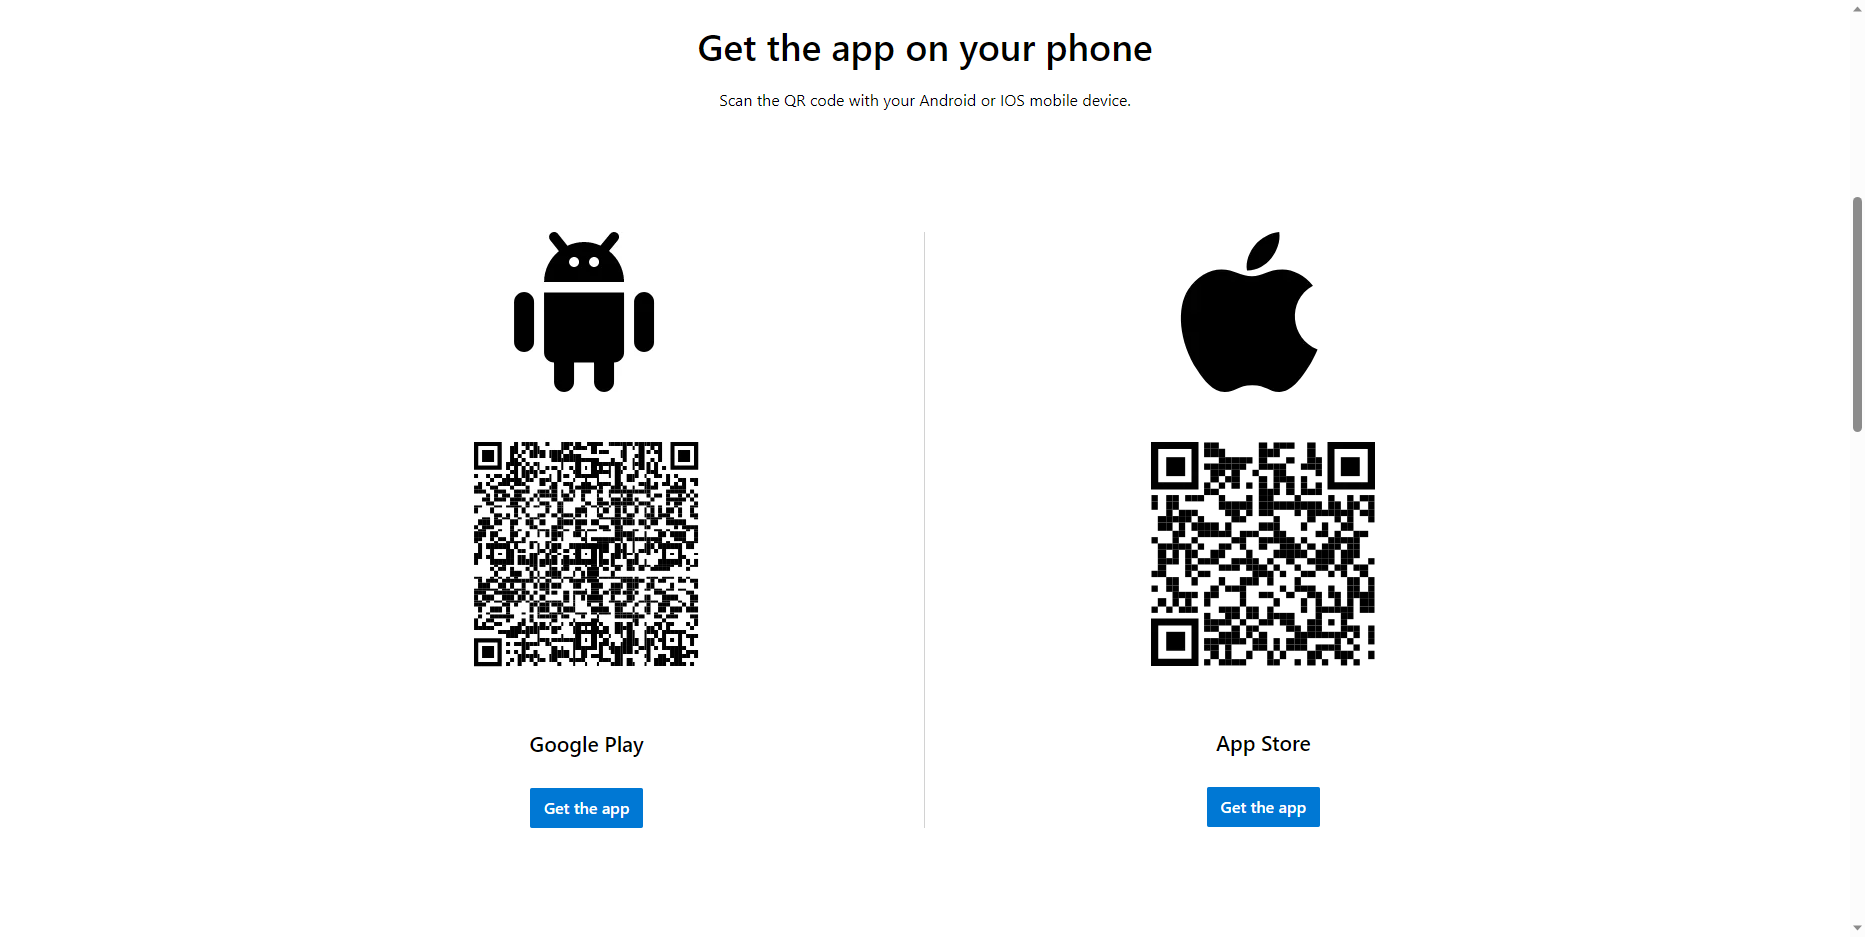
- Open the Authenticator app
- Tap the
+button in the top right-hand corner - Tap Add work or school account
- Select Sign in
- Have the user signin with their same username but with
@perimeterschool.orginstead of@perimeter.org: - The password is the same password they used to log into their computer in the earlier steps
Step 8: Setup Email on Phone
Build Phase:
Connectwise Automate
Step 9: Retire Device from Connectwise Automate
- Shutdown the Device
- Email helpdesk the following subject: (replacing the hash's with the device's PCN number)
Retire from Connectwise Automate PCN ####
Wait for confirmation from Helpdesk that the device has been retired from Connectwise Automate
Windows 11
- Plug computer into NIC (Network Interface Card) at build station
- Make sure that the SSD Hardrive or USB Thumb Drive labeled
W11_22H2is plugged into the NIC at your station - Click on the tab corresponding to the make of the computer to complete Steps 10-13
- Lenovo
- Surface
- Dell
Step: 10 Install Windows 11
-
Power on the device
-
Press
Enterrepeatedly when the Lenovo logo comes up as the computer is booting -
Quickly press
F12to choose a temporary startup device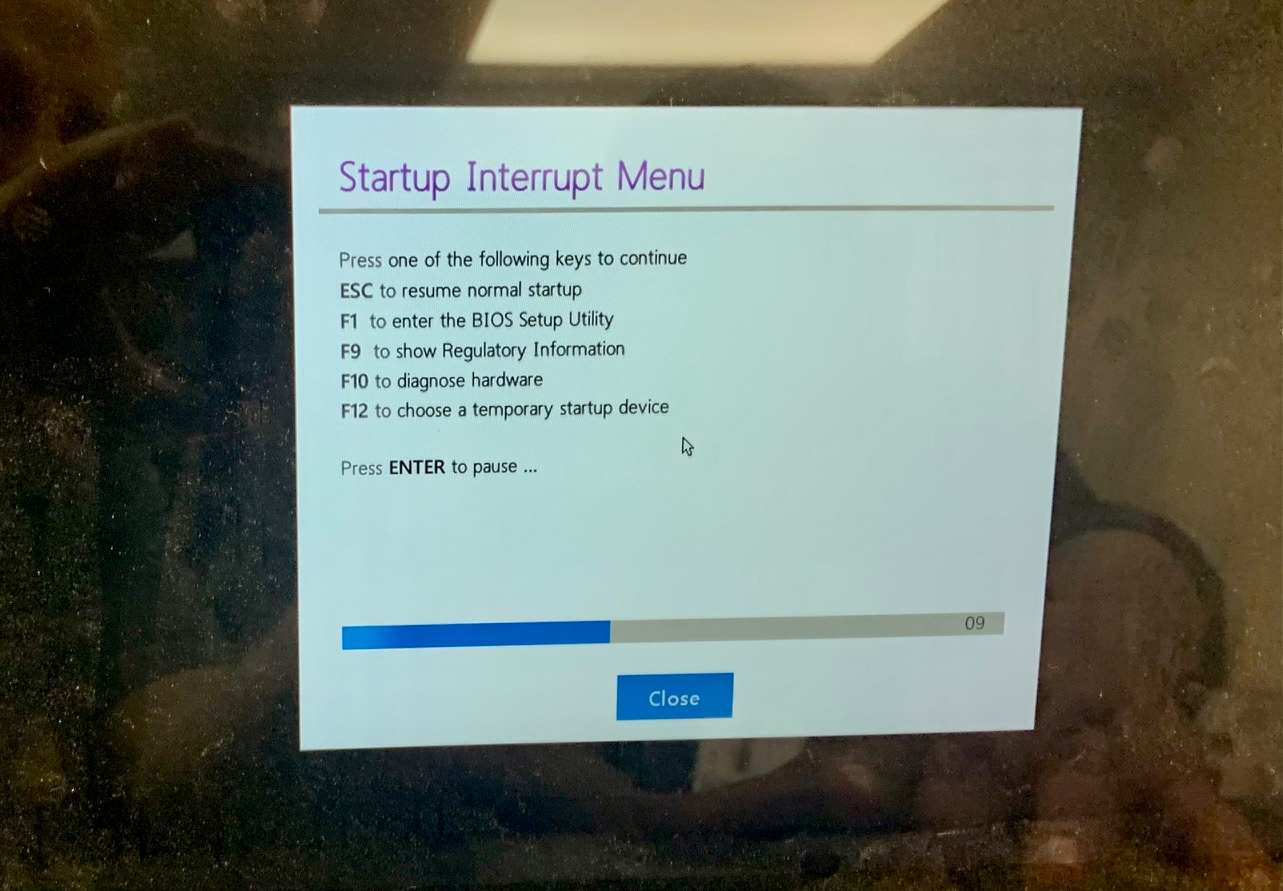
-
Click on the USB object in the list on the Boot Menu
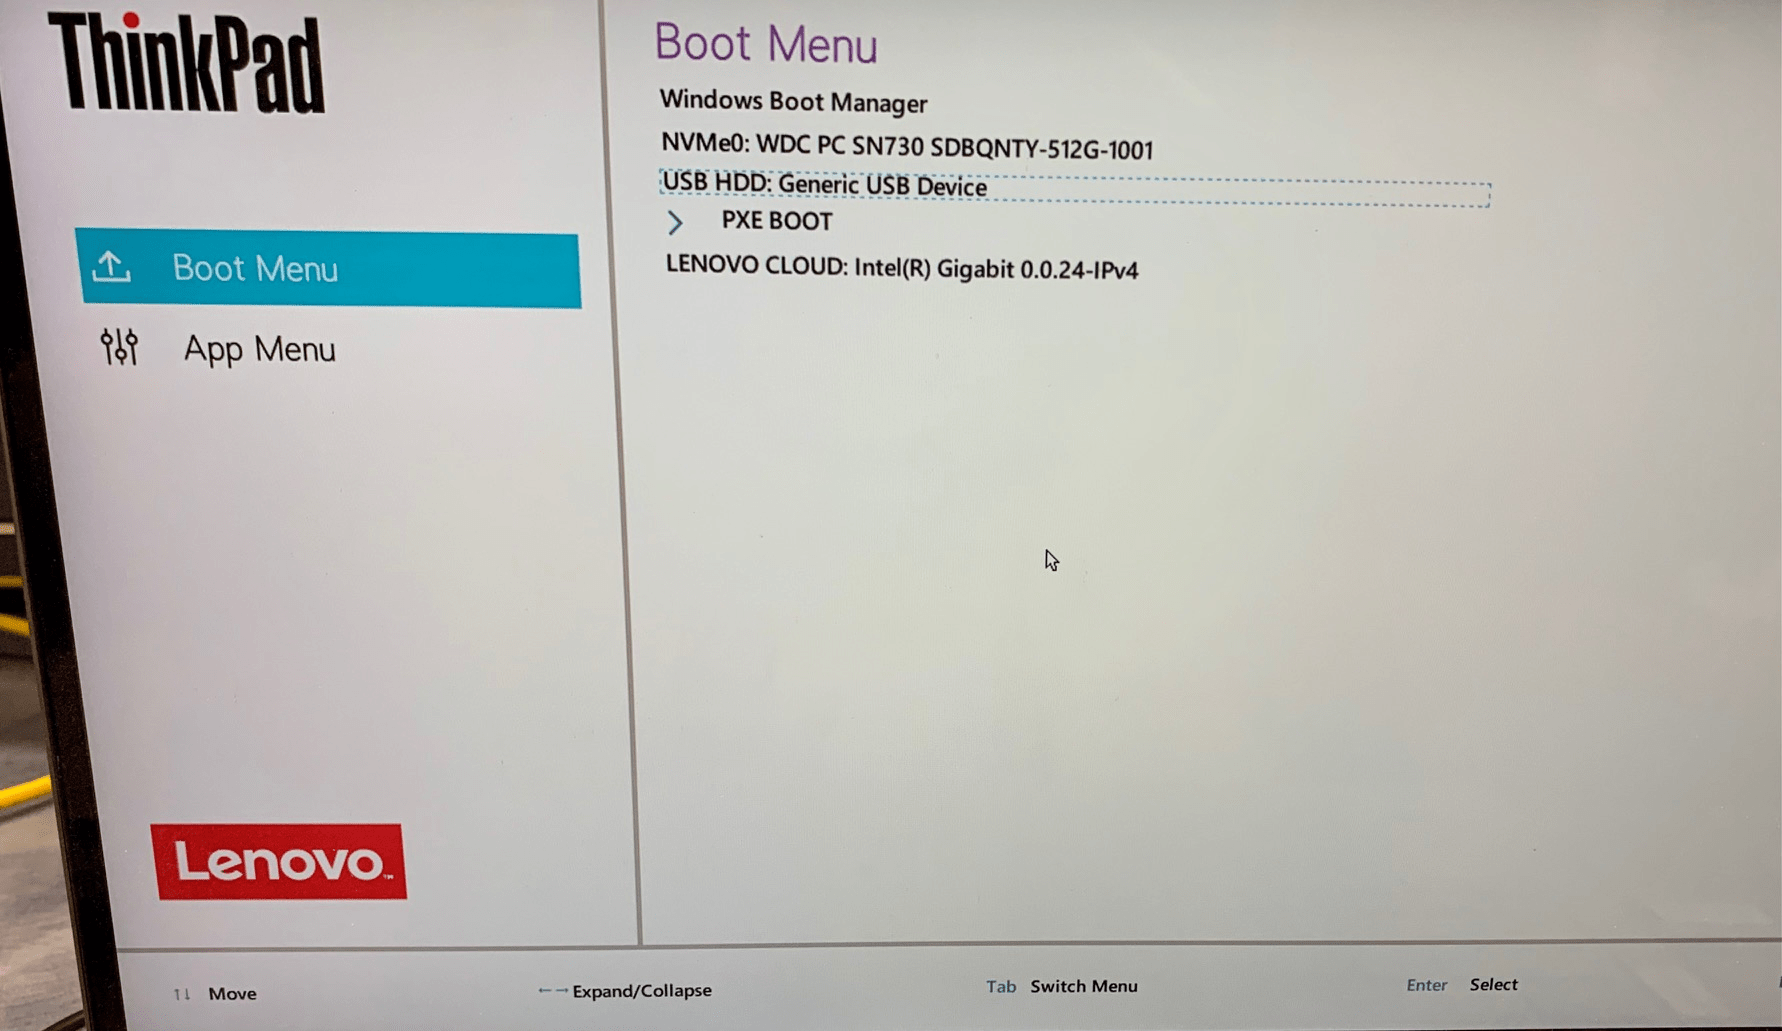
-
Make sure the following defaults are selected and click the Next button in the bottom right hand corner.
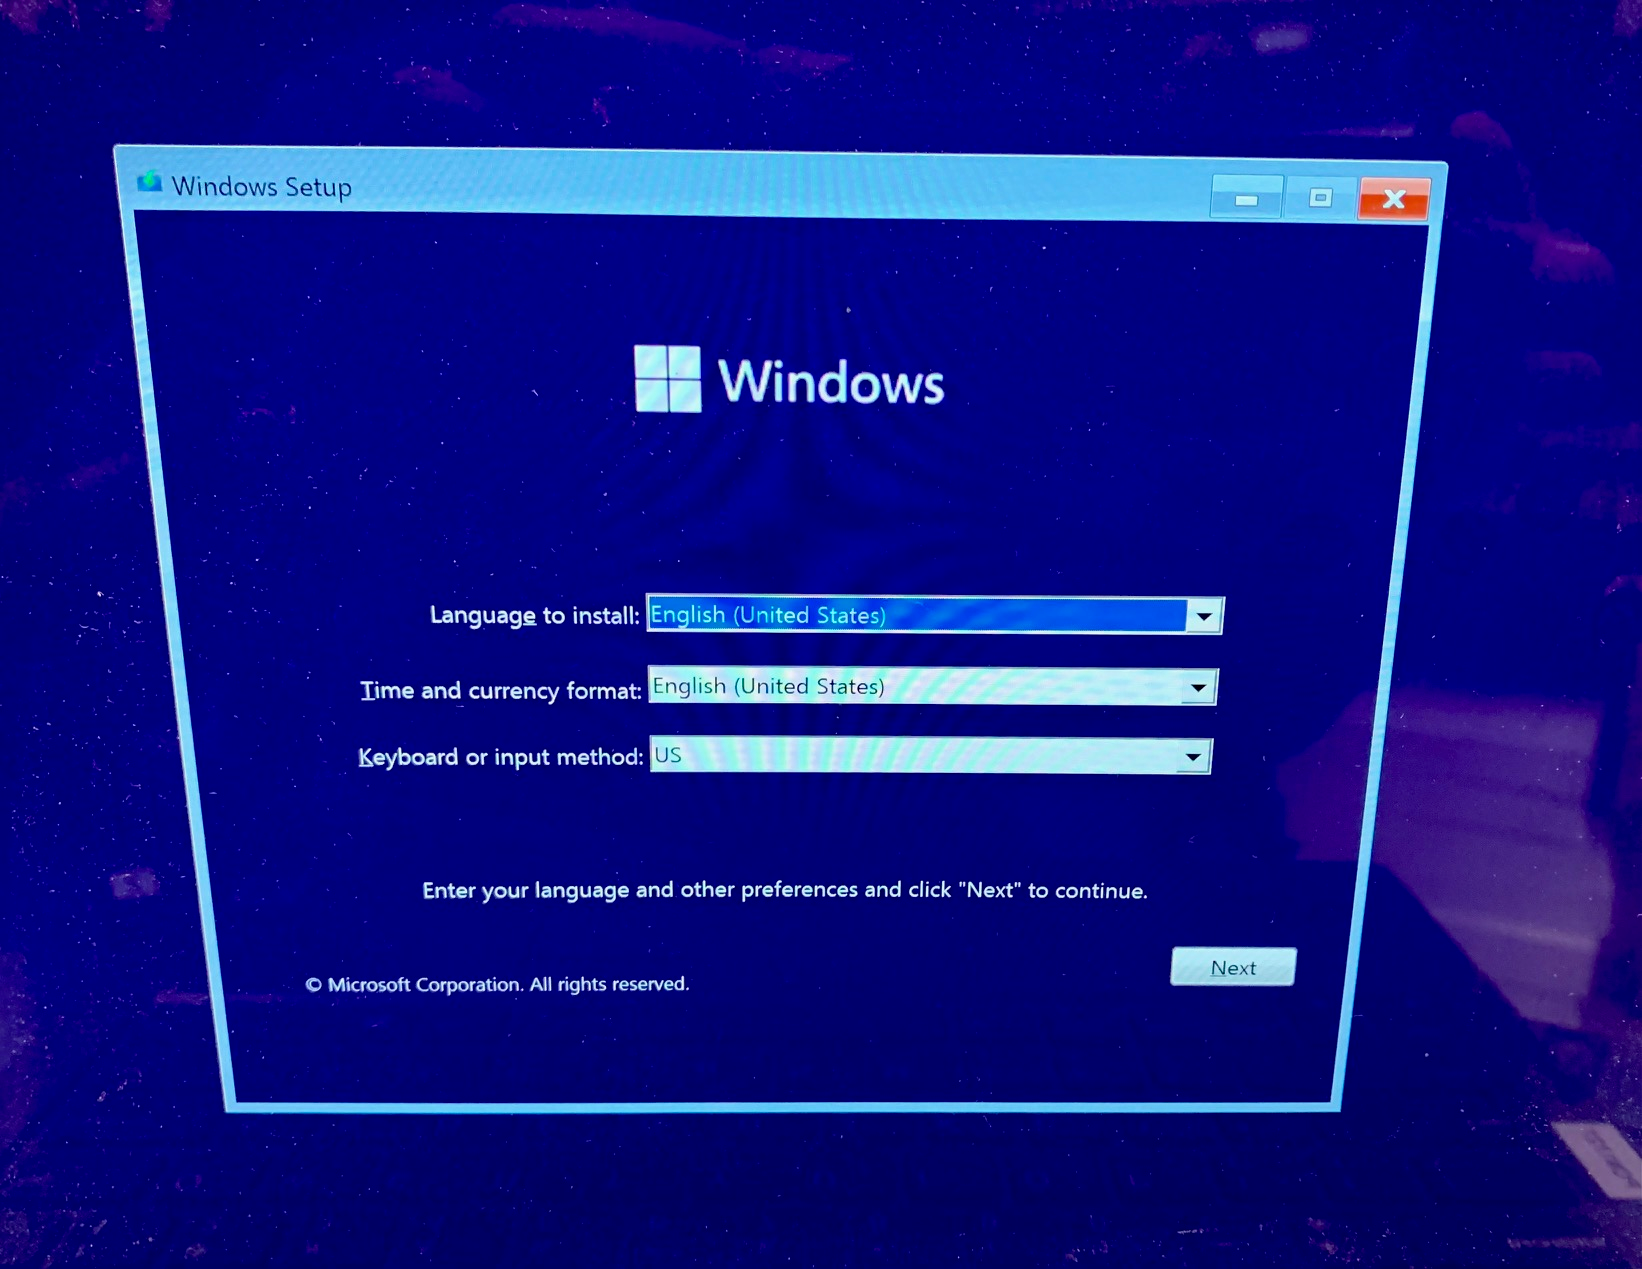
-
Click the install now button
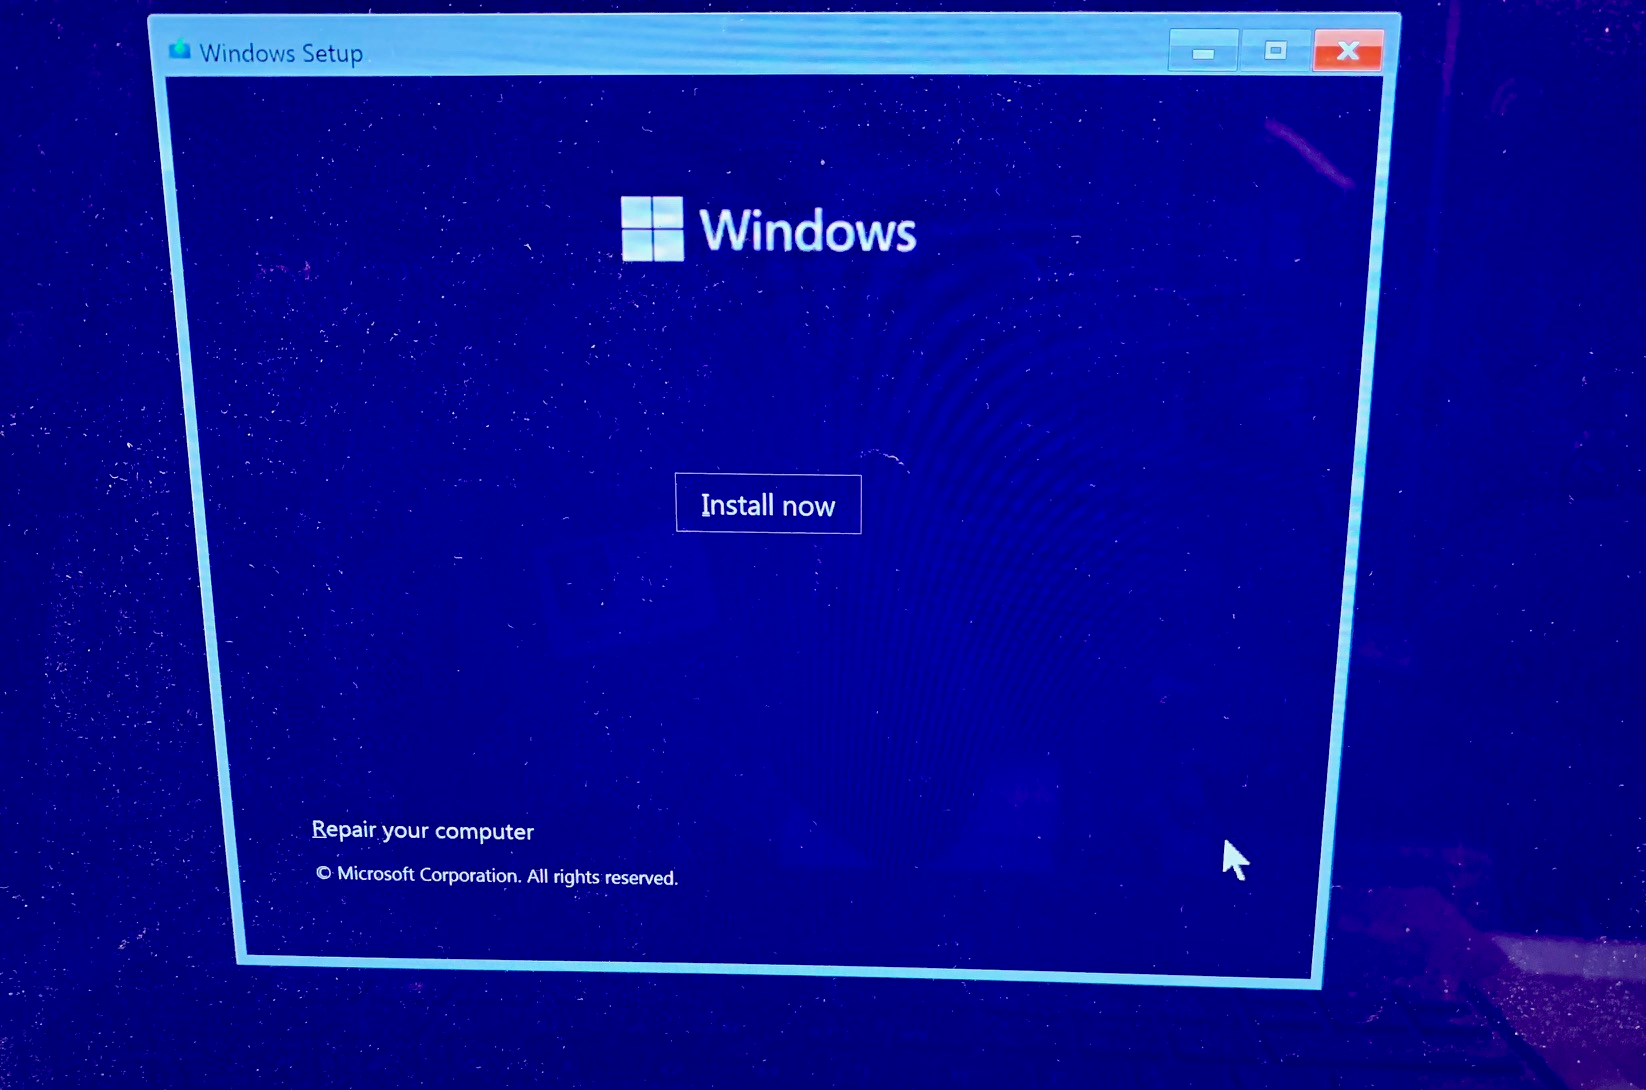
-
Click the checkbox to accept the terms of service.
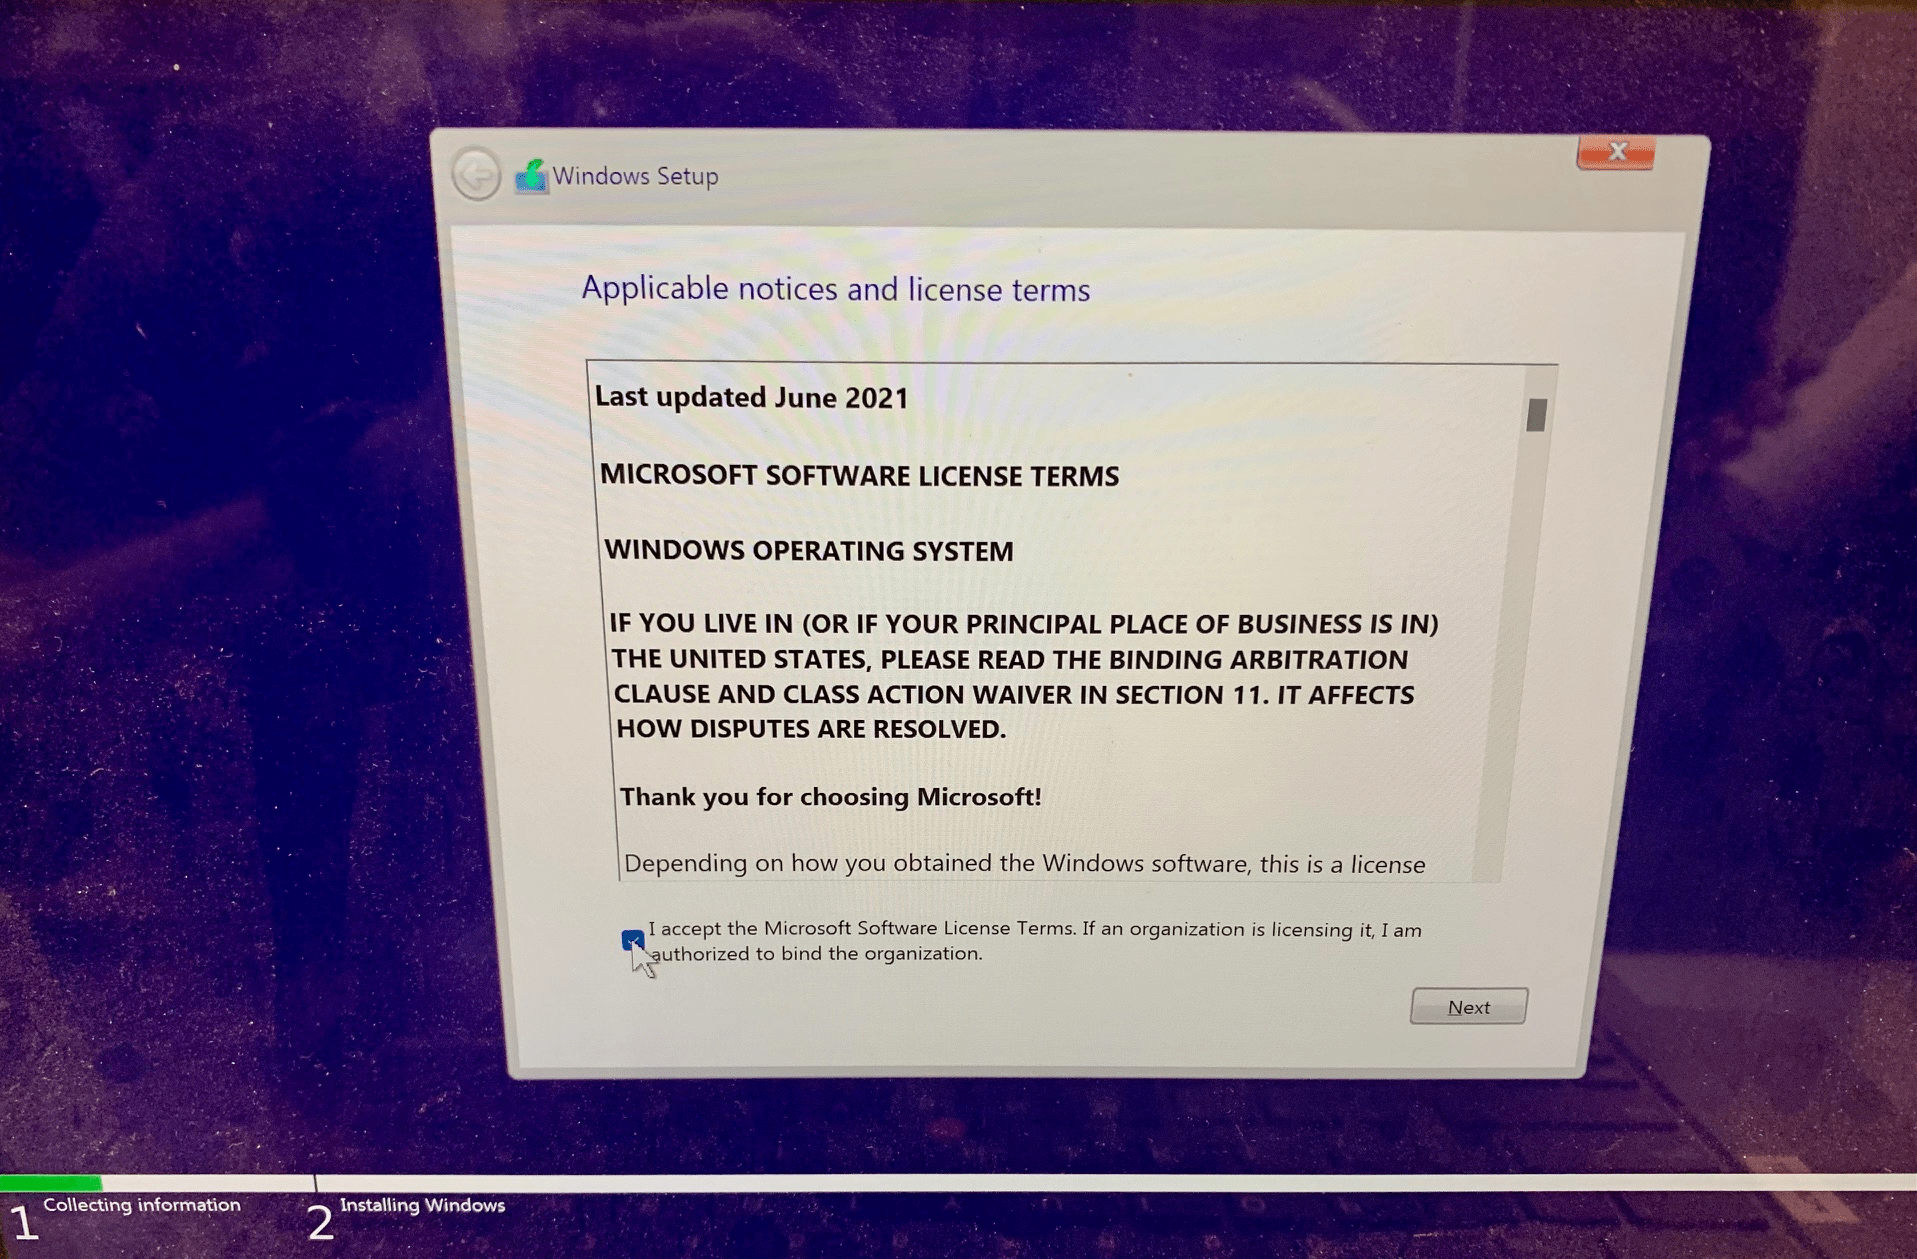
-
Select the Custom Install Option
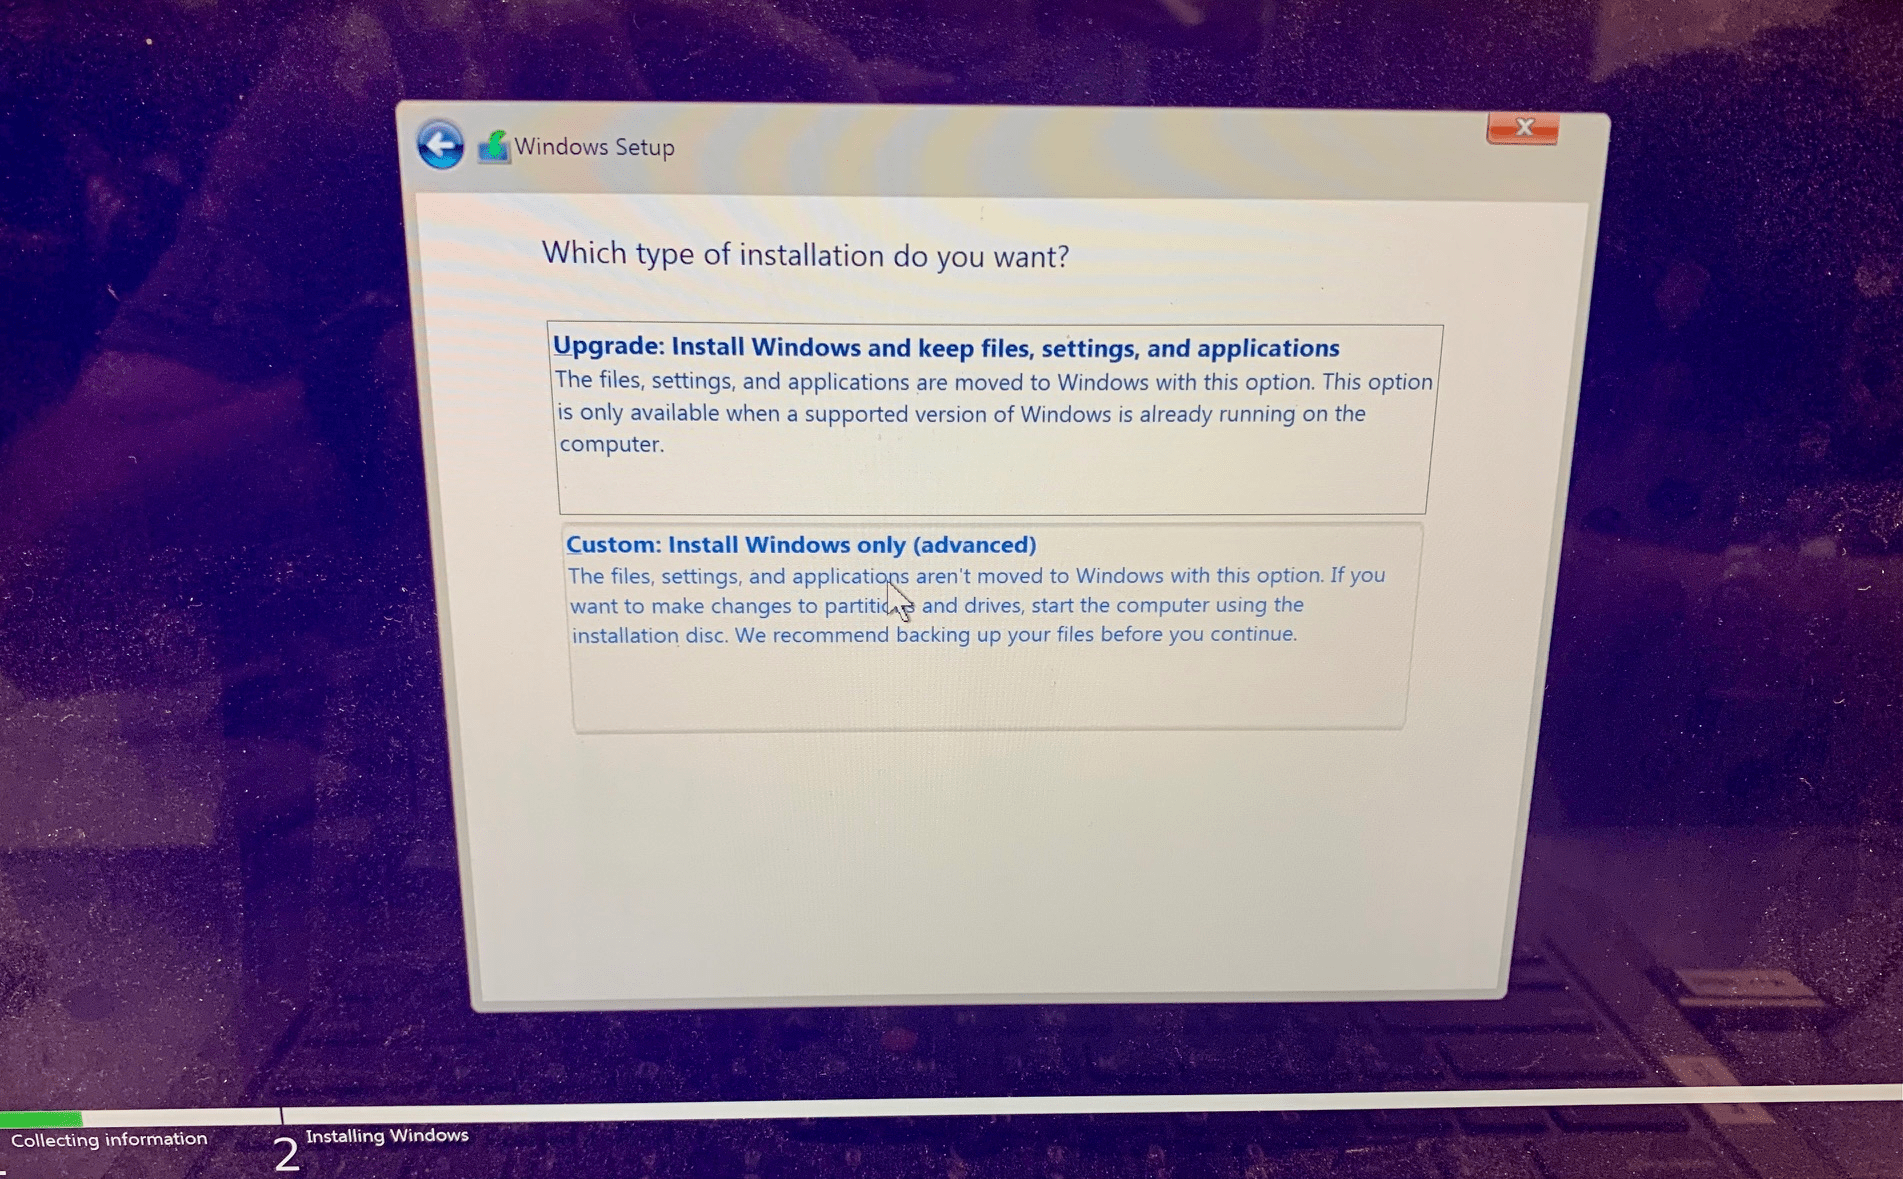
Step 11: Wipe Device
- Select the Primary Partition and select delete in the toolbar at the bottom of the window
- A warning window will pop up and click
ok - Select the "Unallocated Space" and hit next
- Install will start automatically after hitting next
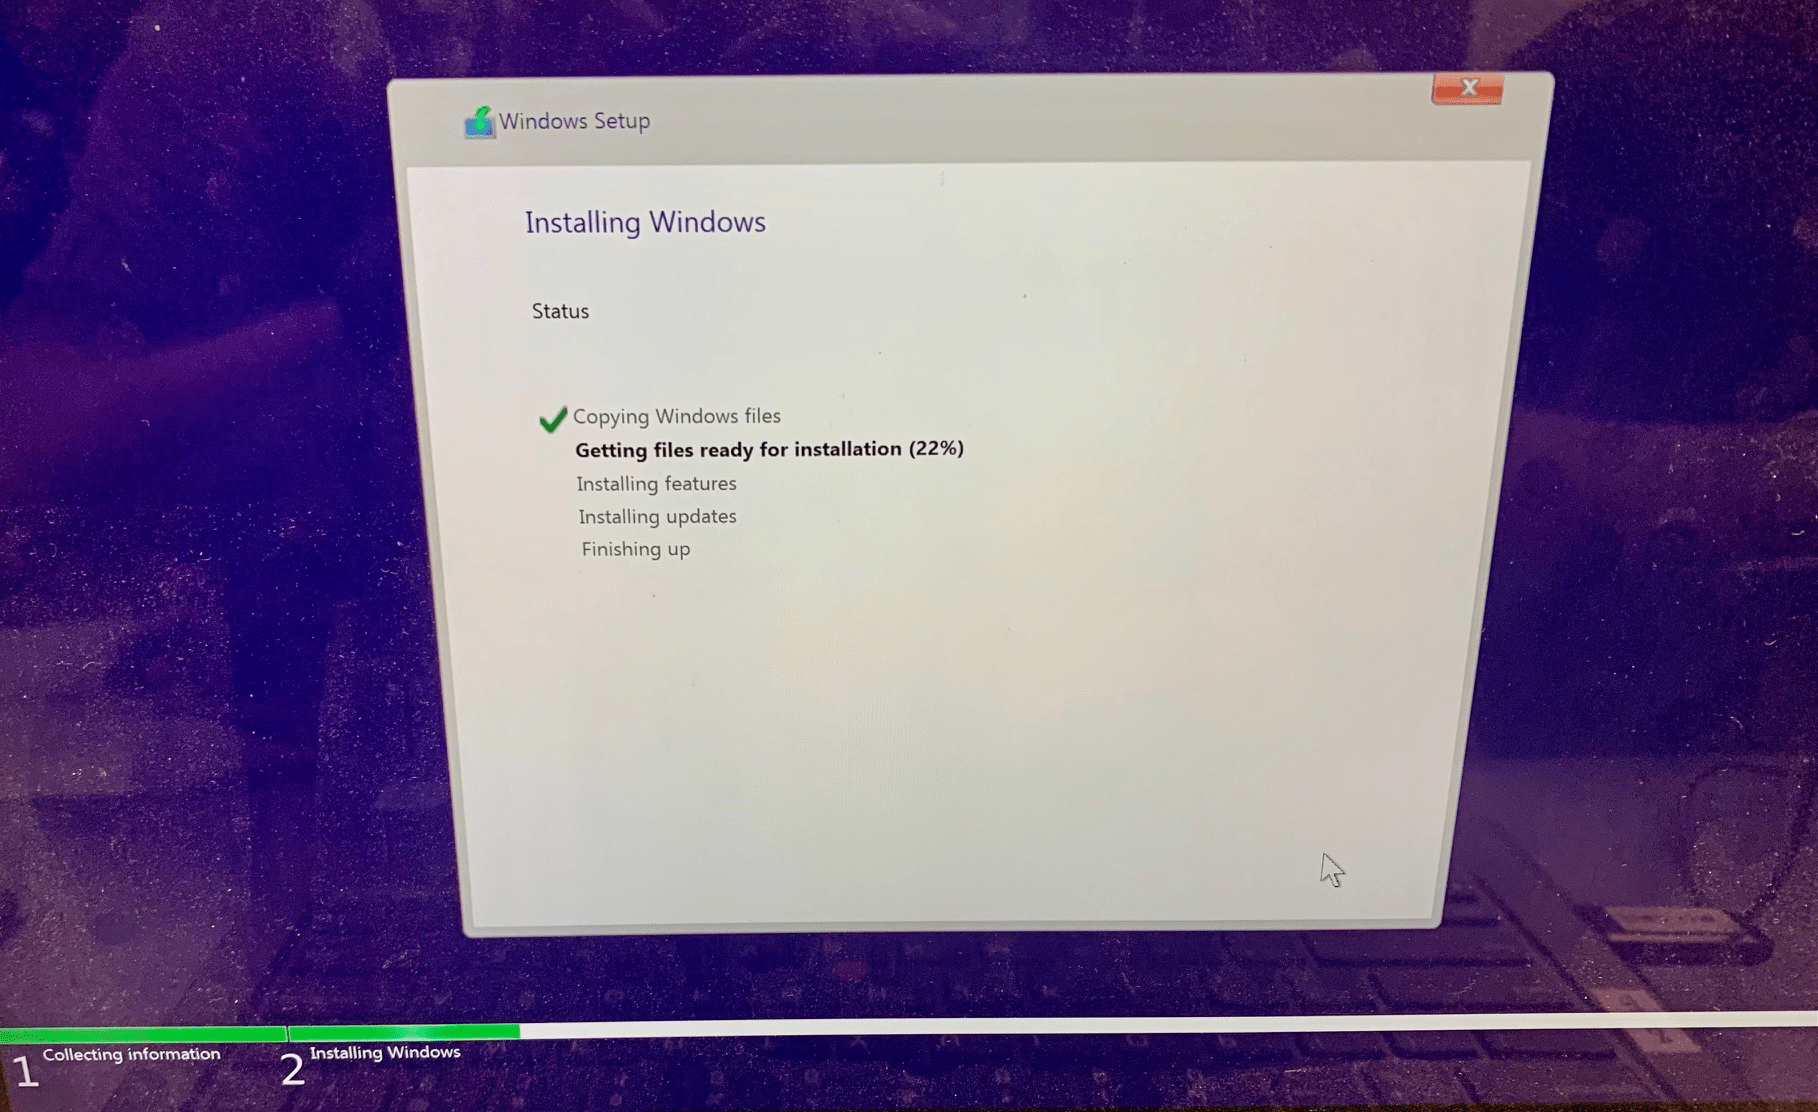
Autopilot
-
Wait for the following Out of Box Experience Screen (OOBE) to Appear
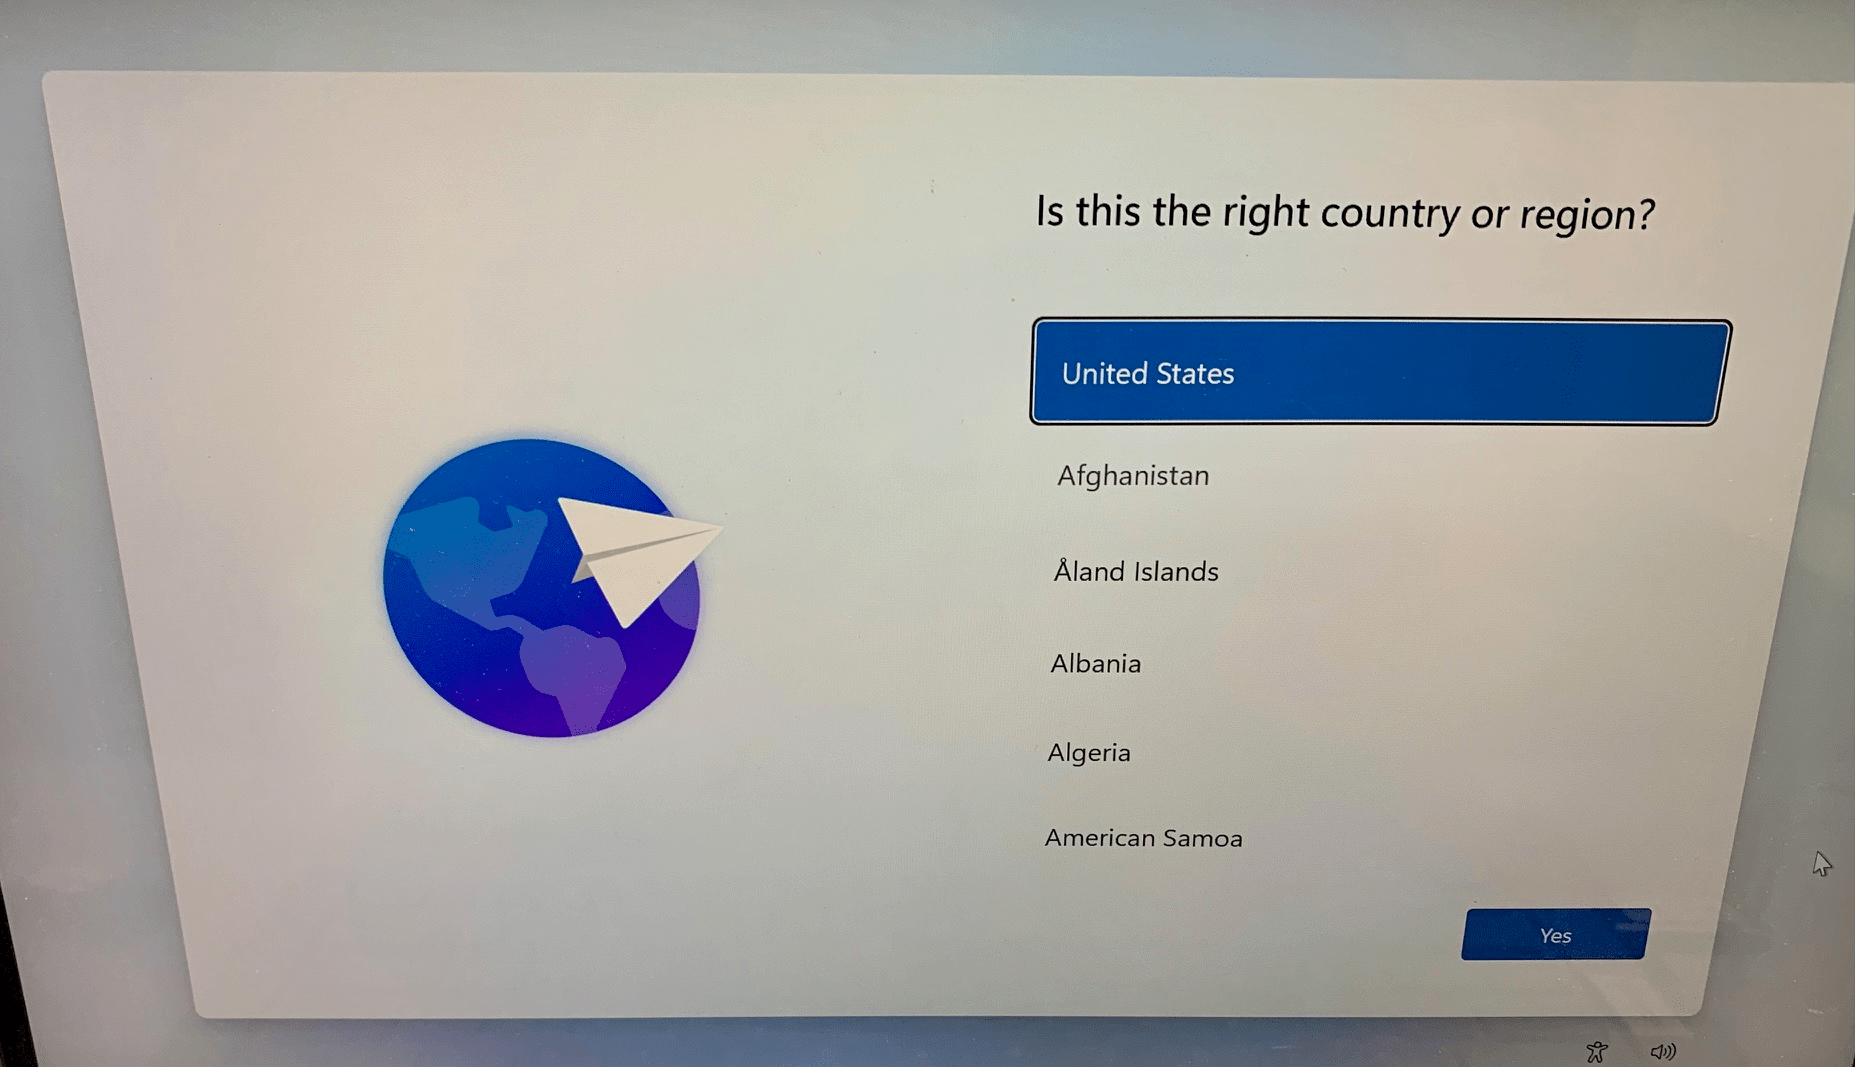
-
Once the OOBE screen has appeared hit
Shift+Fn+F10to open powershell (You may need to click into the powershell window to begin typing)
Step 12: Enroll Device in Autopilot via Powershell
- Type in the following commands listed below:
D:
Enter
Cd _a
Enter
Powershell
Enter
Set-executionpolicy unrestricted
Enter
.\ap1.ps1
Enter
-
Type in the PCN number when prompted for computer name.
-
A login window will appear
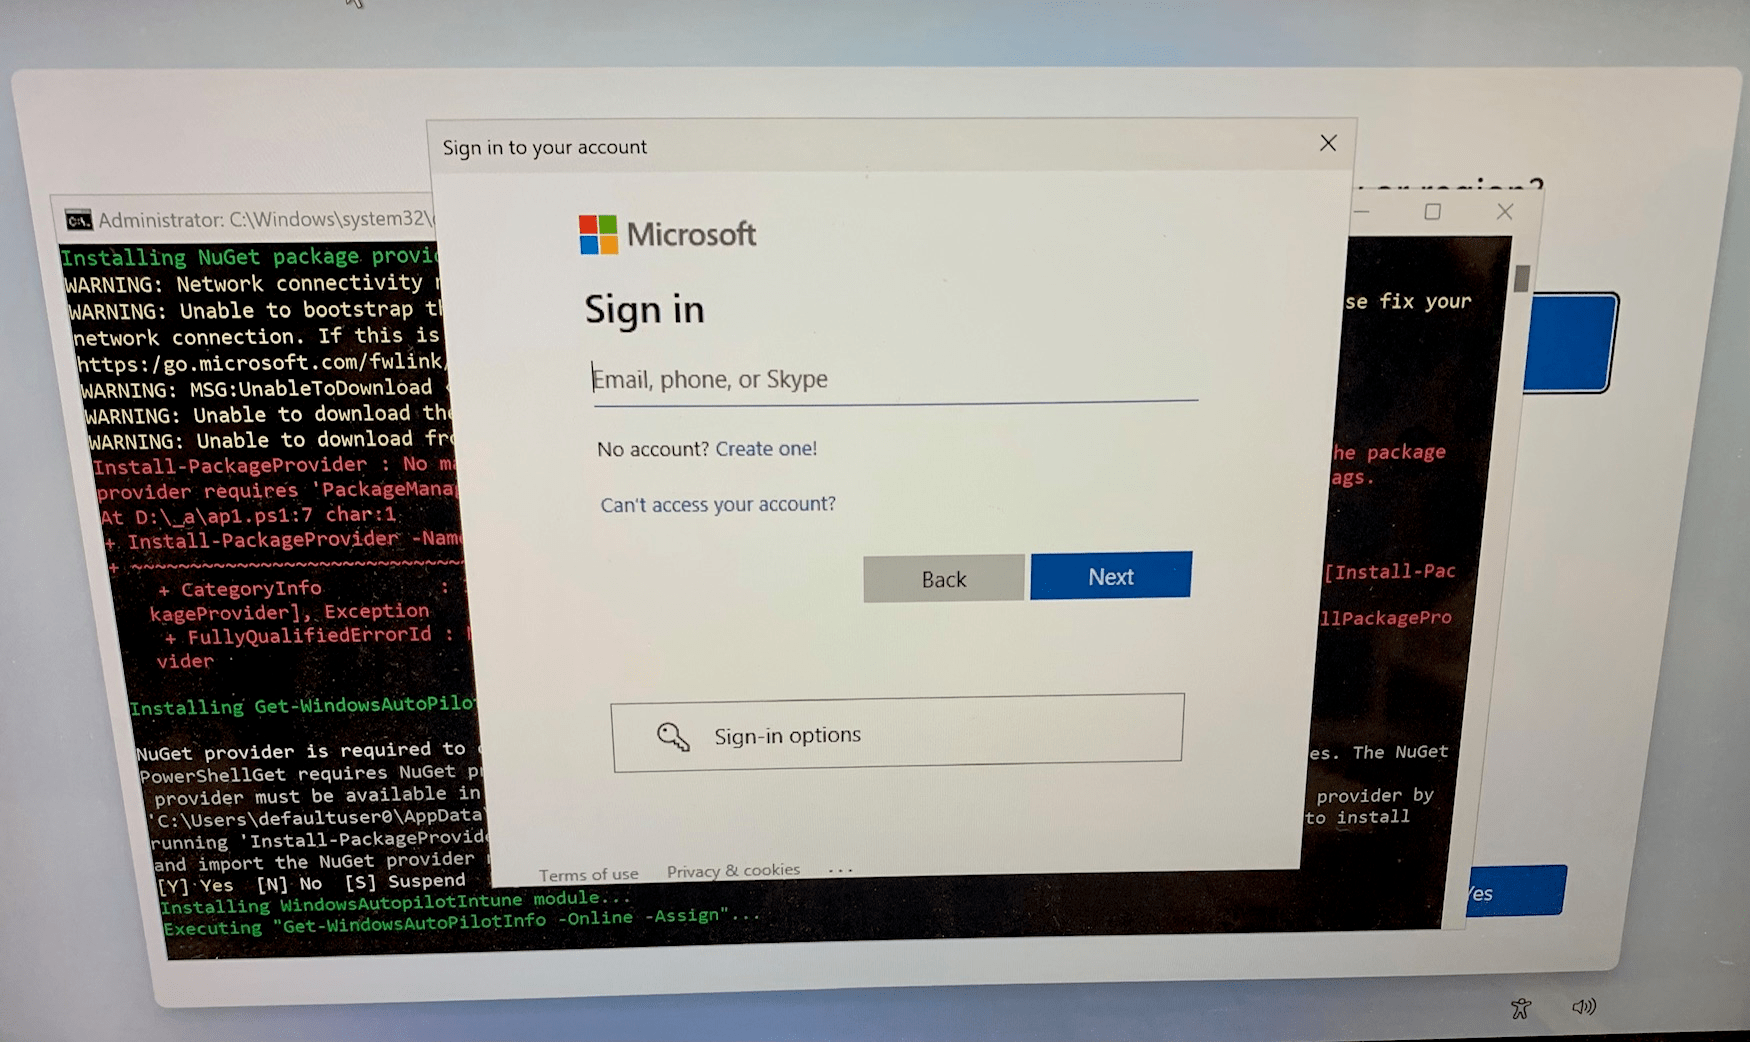
-
Login with the following credentials:
| Username: | enroll-a@perimeterschool.org |
|---|---|
| Password: | *A temporary access password will be given to you at the beginning of your shift |
The powershell script takes about 15 mins to finish. You will know that the script has completed when you see the following line in the powershell window:
Profiles assigned to all devices. Elapsed time to complete assignment: ### seconds
PS D:\_a>
Step 13: Reset Execution Policy and Restart
- Type in the following commands listed below:
Set-executionpolicy restricted
Enter
Shutdown /r /t 0
Enter
- This will restart the computer.
This is for Surface
This is for Dell
Account Setup
Step 14: Email Helpdesk for User's Temporary Password
- Email helpdesk the following subject: (replace the first name and last name with the Faculty Member's Name)
Temporary Access Password needed for [First Name] [Last Name]
Step 15: Finish Out of Box Setup
-
After the restart, select the
United Statesas the region
-
Login using User's
@perimeterschool.orgemail andtemporary access passwordgiven from helpdesk.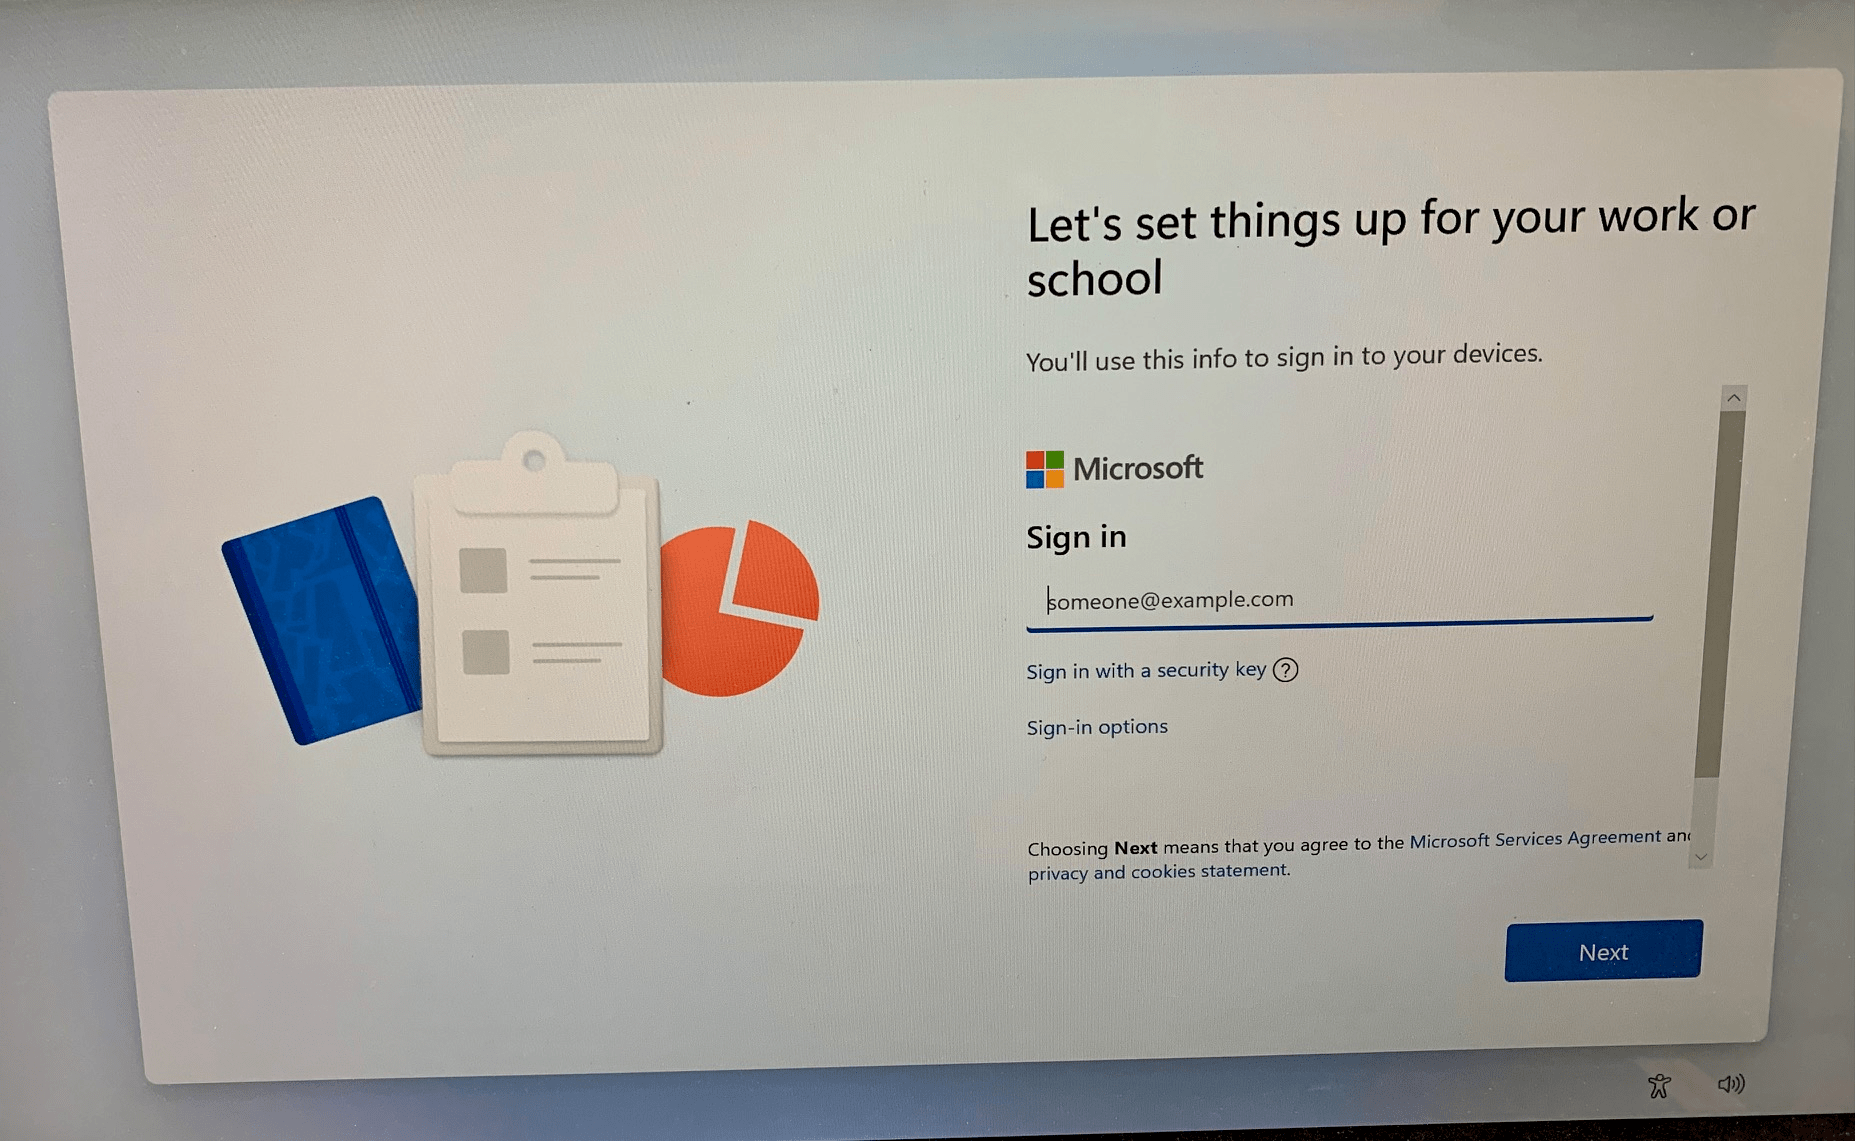
-
After signing in the account will start setting up the device
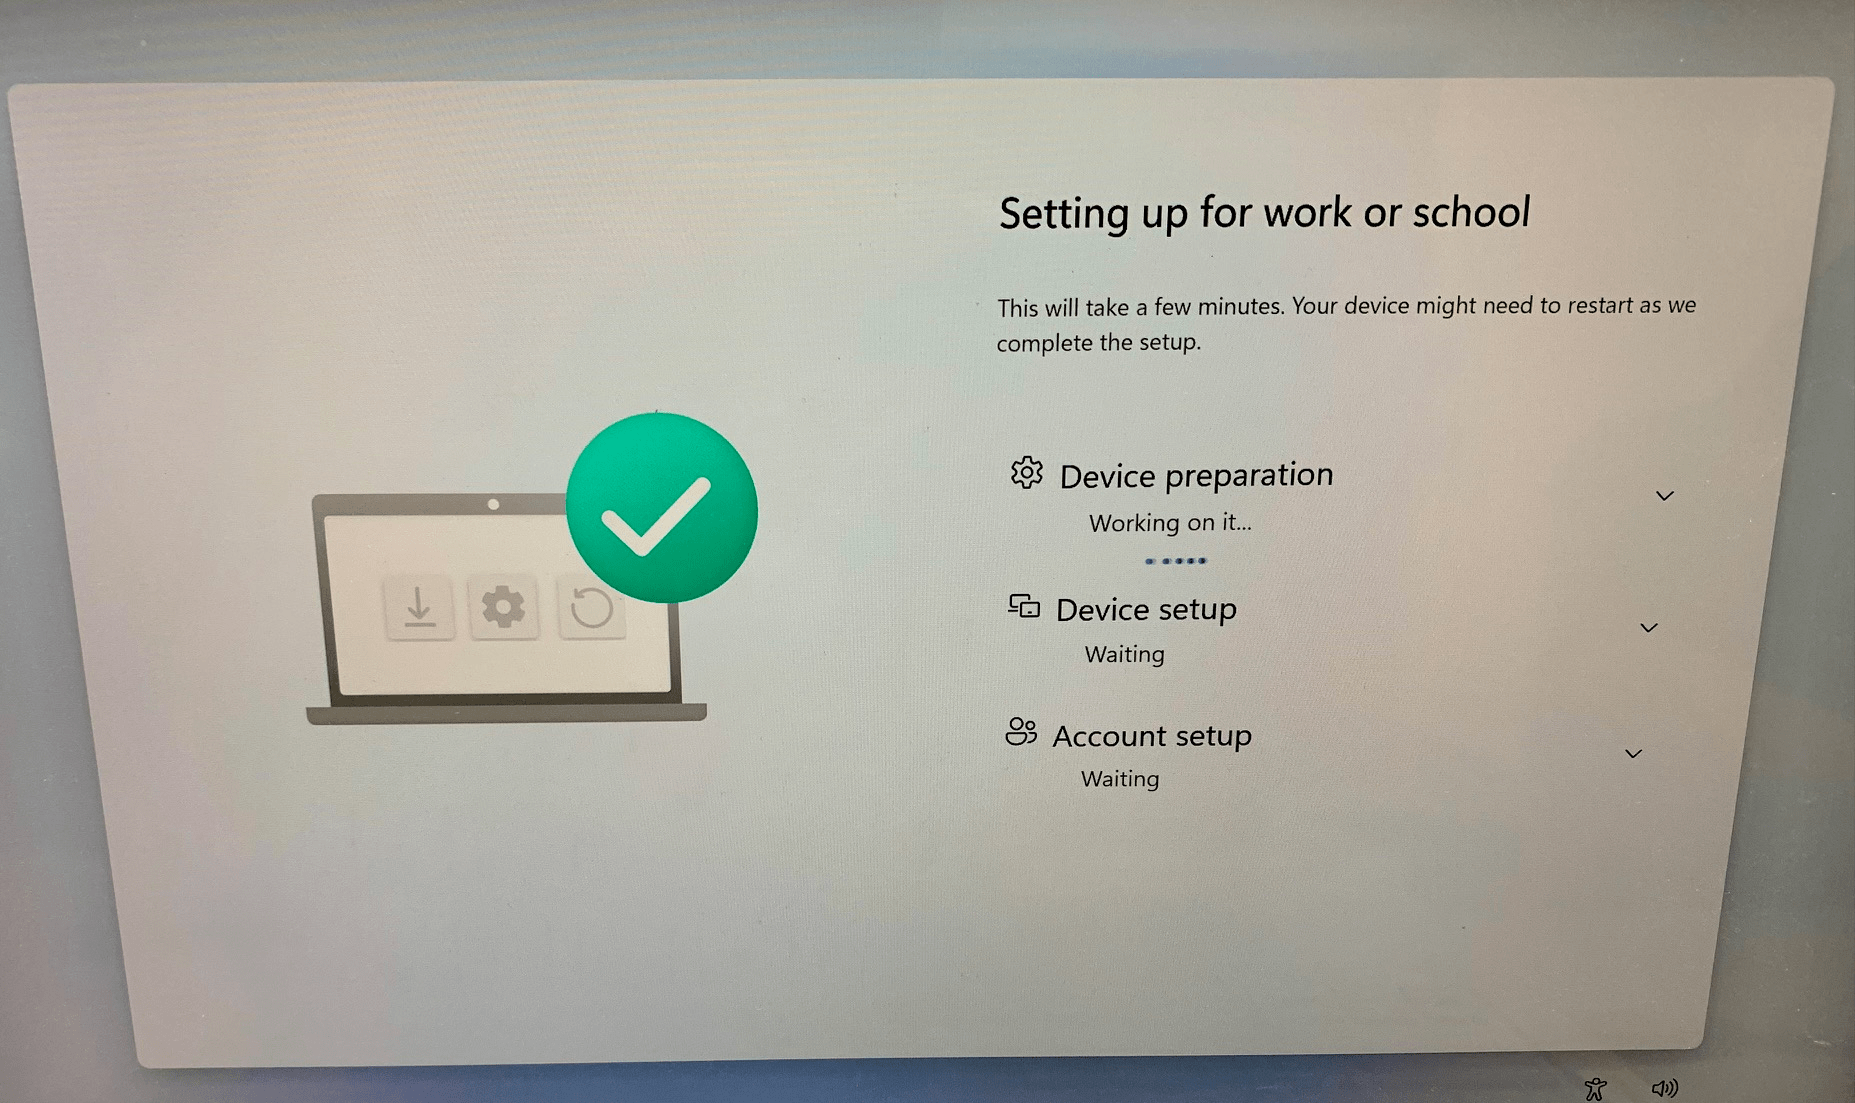
A blue button will appear in 15 min during setup in the bottom right hand corner
- When the blue button
Continue Anywayshows up go ahead and click it.
Import User Information and Settings
- On the build sheet that is attached to the computer find which USB Drive the faculty members data is saved on.
- Insert that USB thumb drive into the computer
Step 16: Import Passwords
Step 17: Import Bookmarks
Step 18: Arrange Desktop
Handoff Phase
Step 19: Contact Faculty Member
Step 20: Sign off Build Sheet
done